5 Common Rivet Mistakes To Avoid
Rivet mistakes: wrong size, improper hole prep, incorrect tightening, incompatible materials, ignoring inspections. Affects structural safety.
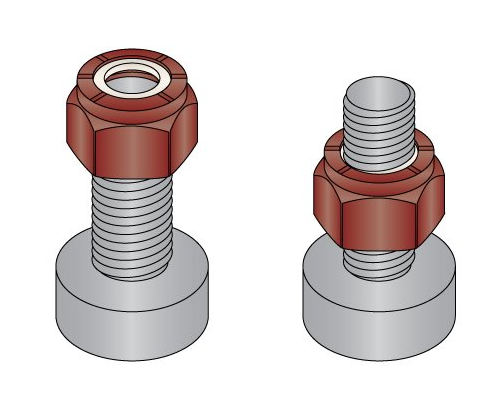
Wrong calculation of grip range
Incorrect calculations of a grip range of a rivet often lead to the defects and increase cost for reparation. The grip range is the total thickness of the joined parts; if it is too low, the rivet will not hold correctly; if the grip range is too big, the rivet will not fit. As such, it is important not to forget about the physical properties and details when calculating the grip range for rivets. It is crucial to consider surface coatings for the materials. The ignored gaps usually increase the total thickness between the parts. For instance, if two sheets of metal are 0.125 inches thick and there is a 0.01 inches coating on each side, the total thickness will be 0.27 inches, not 0.25 inches.
In order to calculate the grip range, it is necessary to:
-
Measure the thickness of parts separately.
-
Aggregate the thickness of coatings or gaps.
-
Ensure that the total thickness is in the grip range.
High wing rivets are a kind of rivets that is used to join the aircraft parts; using the product with the incorrect grip range results in 30% failures for such types of products, especially in the fields of aerospace or automotive industries suffering from high loads. As such, it is always important to check the grip range through the whole list of the rivet specifications. Material properties of the joined parts are often misinterpreted; unlike steel, aluminum expand at 2.3 mm per meter per 100 degrees Celsius. As such, failure to consider the properties of the materials will cause rivet shifts or breaks. Joining different materials in a dual-application rivet also lead to joint failures or materials’ damage in the future.
Always check material information and the grip range accordingly.
Ignoring environmental effects
One such example is a data center, which may stay on the relatively constant 68 °F. Materials such as steel will not clasp or expand due to temperature changes; all other factors, however, still apply.
Ignoring manufacturing tolerances
Manufacturing parts and appliances are done to a tolerance level pro demands. As small as these tolerances may be, anything that cannot be closely micromanaged will and can be sabotaged in some way. Even if the metal sheet is said to be 0.250 inches, that number can mean anything from 0.245 to 0.255 inches. The difference is subtle, but it matters when calculating which size of rivet to use.
Using wrong tools
An example of this error is to try and drove a large rivet with a small riveter. This kind of handheld tool is not calibrated, and it will never be able to set the rivet properly. Always select the right tools and use them properly. Also, the tools should be calibrated on a regular basis in order to maintain the high working standards.
Solution
The opposite process is true as well. Overestimating the tightness of the grip will make the rivet very hard to actually install without causing damage to the materials being jointed. For this reason, it is valuable to calculate the grip range G and add a small margin of error, perhaps as little as 0.05 inches, so an actually viable rivet can be chosen. A similar margin of error should be added together with manufacturing tolerances for the complete rivet thickness T calculation. Using these calculations will aid in installing a respectable rivet, using the right tools for the job.
In order to ensure the correct grip range and the durability of the riveted joint, it is crucial to use the tools properly._recipe: If one neglects this aspect, it is easy to make a mistake in the calculations and fail to achieve the desired results.
Types of Fasteners Recommended in Industrial Settings
Ignore load requirements
One of the most common and fatal errors is when load requirements are ignored. Rivets must be chosen based on the types of load they will be under and the magnitudes of these loads. Ignoring load requirements is one of the major reasons for joint failures, further damage of structures, safety hazards. The following issues need to be considered when calculating load requirements:
-
Shear and Tensile Loads. Decipher whether the load is shear or tensile. For example, if the reason for applying the rivet is its high shear loading, a rivet used for attaching a wing to the fuselage of a plane, there is a need in a high-shear-strength rivet. There might be other applications where rivets are under tensile loads.
-
Load Magnitude. When the magnitude of a load is calculated, the maximum expected load should be specified. If a rivet joint is intended to carry 500 pounds, the chosen rivet needs to carry at least five-hundred pounds plus a safety margin. Choosing a rivet with the load rating of three hundred pounds instead of five hundred can lead to premature failure.
-
Load Distribution. In case of multiple rivets be under load load should be calculated per a single rivet. For example, the rating of a rivet is a thousand pound and an object should be supported by four rivets. It means that an individual rivet will be under a load of 250 pounds.
During a fail analysis, it can be assumed that the most common mistakes are those connected with “Overloading, Dynamic Loads, Vibration, and Retaining Systems”. For example, a designer might not take into account the number of load cycles. For one thousand cycles a minute for a machine can lead to comparable loads, while a stationary application can produce differently huge isolated loads. For dynamic loads, it is crucial for rivets to absorb and distribute energy. In vehicular applications, parts are under constant vibration, thus, rivets need to withstand fatigue.
To implement safety margins:
Each rivet is assigned a load, with the rivet’s design and strength being sufficient to support that load. However, it is rare that a rivet will only ever receive that load and no higher load. The design must have a safety margin that encompasses the load the rivet must support, as well as the highest load it can expect to ever receive. For example, if the rivet must support a 500-pound load and the highest load it can reasonably be expected to receive is 700 pounds, then the rivet must have a safety load of 200 pounds. This is a 50% safety load, as 200 pounds is half of 400 pounds, the difference between 500 and 700 pounds.
Ignoring Environmental Loads Many environmental factors can put additional strain on a rivet. Rain, wind, and ambient temperatures can all impact a structure and put load on its rivets. Ignoring these loads will cause the rivet to weaken over time and result in failure. For example, rivets on the outside of buildings such as lighthouses need to be able to withstand wind and thermal expansion.
So a designer would:
Observe Environmental Conditions What is the rivet being exposed to? High winds, flowing water, and high temperatures can damage or put strain on a structure. For example, rivets in a lighthouse must withstand many miles per hour of wind, as well as the heat and humidity of being by the ocean. Be climate resistant Make sure the rivet is made of material that is resistant to the environment. If the environment has rubbing wind, use an iron rivet. If the location is particularly salty, use an aluminum rivet.
Not all conditions affecting rivets come from the load on the rivets. Many other factors come from what isn’t affecting them. Ignoring safety margins, environmental loads, and environmental conditions will lead rivets to fail.
-
Apply a Safety Factor: Select a safety factor based on the application and potential risks. For instance, a safety factor of two or more could be used for a critical application.
-
Select Rivets in Accordance: The rivets should be selected in accordance with the load ratings that meet or exceed the safety margins. In the application of aerospace, the safety of rivets is critically important and, therefore, the material is bound by stringent safety requirements to ensure it does not suffer from failure due to poor quality.
Top view hole size
Inappropriate sizing of the top view hole of rivets would not promote the proper performance of joints but could lead to the failure of structures. The size of a hole should exactly fit the diameter of a rivet. A hole that is too large can displace a rivet from proper position or make it fail when loaded. Conversely, a hole that is too small can prevent a rivet from entering and thereby cause damage to a joined material. The following steps should be taken when sizing the top view hole:
-
Measure the Diameter of a Rivet. A caliper can be used to measure the exact diameter of a rivet. In case a rivet has a standard diameter of 1/8 inches, or.125 inches, then a hole should be.002 to.003 inches larger and equal to.128 to.133 inches.
-
Take the Thickness of Material into Account. If a joined material is thick, a hole should be slightly larger to accommodate expansion of a rivet. For example, if a hole is to be made through a.25 inches thick aluminum sheet, then it should be increased by.005 inches and take the size of.133 inches.
-
Consider Tolerances. Both rivets and holes can slightly differ in their exact sizes. Then, a hole’s size should be within the required tolerance range. For instance, if the diameter of holes should equal.1875 inches, the tolerance could be equal to.003 inches.
Inappropriate use of a drill bits is a typical source of mistakes. Different drill bits may be slightly smaller or larger then the required size, and their inappropriate use may undersize or oversize a hole. A hole would also be smaller than a rivet’s diameter if some inaccurate methods would be used for creating it. A hole and a drill bit’s sizes are to be taken from a manufacturer’s recommendations. For example, when a hole’s diameter should equal.257 inches, a manufacturer should recommend a #F drill bit, the diameter of which usually equals.257 inches.
-
Test on Scrap Material : Before you drill on actual workpiece, test the drill bit onto the scrap material of the same substance first so that you could verify that the size of drilled hole is precise and could fit the rivet properly without causing any damage onto the actual part. You don’t want to drill onto the workpiece only to realize the hole is too small for the rivet to get into. [2] cite that the first step to the proper fitment of a rivet is to ensure that the hole drilled for it is the appropriate measurement.
-
Maintain Drill Bits : Ensure that your drill bits are all in good condition and sharp because a dull or poor quality drill bit does not drill accurate holes; some may be too large or small for the rivet to fit in properly. In such cases, the connection would not be as tight as it should, leading to low performance of the joint and its eventual failure.
-
Overlooking Burr Removal : Burrs can be formed around the hole edges while drilling, and these affect the fitment of the rivet and the purchase of the hole, if not removed. Again, this causes the rivet not to sit in properly, thus preventing it from expanding to tighten the materials together: hence its failure. You should always ensure you get rid of any burrs formed around the hole after drilling has been completed.
Ways to remove burrs :
Use a deburring tool: The above procedure is the most efficient way to go about removing burrs from the holes drilled. A manual deburring tool is fixed and placed onto the hole edge of the burr. You then rotate it within the gap to smoothen out the edges of the hole by scraping off the metal whisker flaring along the opening.
Sandpaper or file: If the holes are smaller in size, you could use a fine grain sandpaper or even a small file to rub off the burrs. You should be careful not to overdo it or else you’d be expanding the hole size: not to forget ruining it after some time.
Check for smoothness: Run your finger around the surface of the hole to make sure it grasp the metal smoothly, and if it doesn’t; then the burrs are still present.
-
Ignoring Hole Alignment : Lean out how to keep the hole onto the materials lined up uniformly. Holes not aligned correctly on the respective materials joined clearly will instigate an independent load on the rivet, causing its failure over time.
How to ensure hole alignment:
Use clamps to hold the materials together on each side before drilling to ensure holes are properly aligned. With the materials held in place, drill holes onto them.
Check Hole Alignment: Rivets can be used only if the drilled holes perfectly match the space on the parts being joined. There are some steps that have to be taken once the holes are drilled. Initially, the tools and materials have to be laid out. Then, the materials have to be aligned and check the spacing in between them. After that, the rivets have to be secured and the first rivet slowly hammered in place. A test of the hole locations has to then be made by loosely fitting them into the holes.

How To Accurately Assess The True Cost Of Fastener Use For Any Project
Ignore material compatibility
If rivets are chosen improperly as for their material, premature failure, reduced joint strength, and corrosion can be the result of the error. Both the rivets and the components they are used with should be compatible in terms of material. Different factors need to be considered in the case of material compatibility:
-
Galvanic Corrosion: When two different metals are in contact with each other, and the particular connection is exposed to electrolytes such as water, galvanic corrosion may occur. An example of the particular problem is an aluminum rivet being used with a steel piece. In this case, there will be rapid corroding of aluminum. In order to avoid the problem, it is possible to use rivets made from the same material and prevent galvanic action through using a barrier material.
-
Environmental Factors: The particular conditions of the environment in which the rivet is used will affect how to choose the best material. For example, it is better to use stainless steel or monel rivets in marine environments because of their excellent corrosion resistance. On the other hand, in the case of high temperatures, the use of titanium or nickel alloys seems to be more preferable as the materials do not become weaker at extremely high temperatures.
-
Mechanical Properties: understanding the properties of the material used is important as the material used for a rivet should be of equal quality as the materials it is used with. When a rivet is too weak, it will cause that the joint disconnects. In the case of using it is tough materials, the rivet can fail to attach the materials. An example of the situation includes the use of a soft aluminum rivet with a high-grade hard steel component. In the case, there is a high probability of failure.
Galvanic Series
It is important to consider the concept of galvanic series when thinking about choosing the material for rivets. The particular series provides the ranking of metals in terms of their electrochemical potential in the particular environment. Practically, metals that are in a short distance from one another will not experience problems when placed in a connection. It is possible to refer to the galvanic series to assess compatibility of the materials:
-
The rivet and the connected material should be determined.
Check Compatibility: Check the relative position of the materials on a galvanic series chart. For example, since titanium and stainless steel are close to each other, titanium rivets are close to stainless steel rivets in order of compatibility for corrosion resistance.
Select proper materials: Select rivet materials of which the possibility of galvanic corrosion is low. If aluminum and steel are to be joined, consider using aluminum rivet and an aluminum rivet with a protective coating for corrosion resistance.
Coatings and platings: Applying coatings or platings on rivets can promote material compatibility and resistance. Examples of such coatings or platings are zinc plating, anodizing, and cadmium plating. These platings and coatings act as a barrier by preventing the direct contact between two dissimilar metals. This in turn helps two different materials expand and contract independently and reduces the possibility of galvanic or bimetallic corrosion. This in turn extends the life of rivet and its materials. In particular, corrosion is likely to occur where coatings are improperly applied and then flake off due to age and usage.
In order to apply coatings skillfully:
Select proper coating: Select the coating that is actually case-matched and is required. For example, when plated with zinc, it may be applicable in a gentle environment, and anodizing is more advantageous when applied to aluminum rivets.
Ensure proper application: Make sure that it is applied evenly, and that it is properly attached to the surface of the rivet. Coating that is poorly attached to the rivet drops and exposes the base metal. With the passage of time, the exposed basemetal starts to rust.
Maintain a plate-lasted surface. Occasionally rub it with a rag. In relatively adverse environments, the craftsman needs to be brushed up to a certain level over time.
Thermal expansion compatibility: When the difference in the thermal expansion coefficient of the rivet and the material its fastened to is ignored, the additive material connection is eventually broken primarily by thermal expansion and contraction. For instance, the coefficient of linear expansion of aluminum is larger than that of steel.
Expansion Rates
Matching expansion rates is an effective means of minimizing thermal stresses. However, it may be difficult for materials that the components are made of to be sufficiently similar in this regard. When they are not, it is possible to choose a material that is used with the small and the big parts and has a similar expansion rate compared to the small component. For example, if the rivets connect a small plate made of steel and a large one of Inconel, it is possible to substitute them with stainless steel ones, as both Inconel and stainless steel have relatively similar expansion rates. It should be noted that better match could be found, as in pure Inconel rivets; for example, the rate of expansion. The small element or the large one receiving the fewer stress can also be changed, although it will be less effective.
Design for Expansion
Yet another option to allow for expansion is to design the connection in such a manner that some movement between components is allowed. This can be done by making the hole for the rivet too loose and filling it with an elastic gasket. The latter is preferable over simply enlarging the hole as it absorbs the vibrations and prevents the components from moving relative to each other.
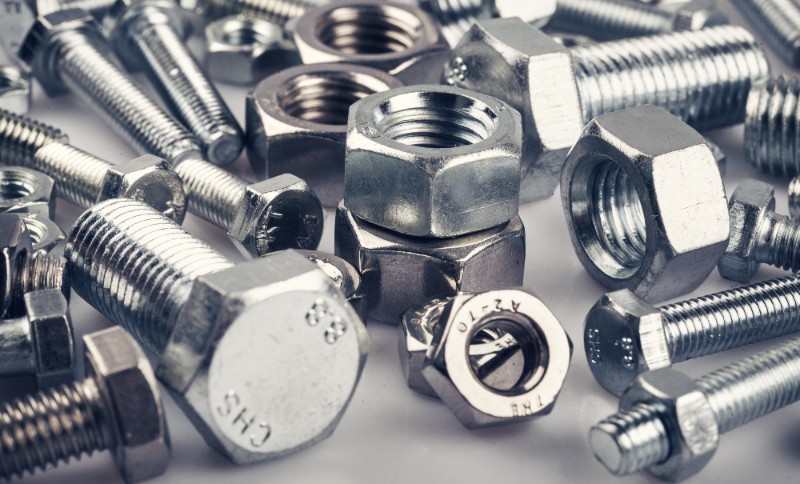
Hardware bolts and nuts top view background
Using incorrect installation tools
Using a wrong installation tool can result in inefficient joints, which can cause part failure and costly joint redo. It would help you choose the right installation tool for a secure rivet. The primary consideration for picking installation tools are:
-
Tool Type — different rivets need different tools. For example, do not use a hand riveter on an industrial-sized rivet. Other common tools include the manual riveter, pneumatic rivet gun, and hydraulic riveter.
-
Tool calibration — it is crucial to calibrate the tool and ensure that the force is applied correctly. Over-calibration of the tool can damage both the material and the rivet, and under calibration can trigger incomplete installation. Calibration should be a regular practice.
-
Nosepiece — nosepiece is an important part of the tool that needs to be matched with the rivet size. The incorrect nosepiece can install incorrectly or deform the rivet. For example, for a rivet of 3/16 inches, use a nosepiece of 3/16. Hand riveter is a good tool for low volume works, such as DIY and very small repairs. The thing you have to know is:
-
-
It is only suitable for small rivets and not for high stress and high volume applications. Most hand riveters can only handle a rivet up to 1/4 inches.
-
After picking a tool, you need to install the rivet. It is important to pick the right size. Most rivets are sized in inches. Hand riveters have an instruction sheet on how you can properly load the rivets and use the tool. Lastly, you should check the head and ensure that the rivet is deformed properly. On the blind side, the head should be fully formed and tightly flush in the hole.
-
Pneumatic rivet guns are recommended for high-volume and industrial applications. Since they provide consistent force and speed to a manual gun, they perform exceptionally well in assembly lines and heavy-duty tasks. The following should be considered to effectively use a pneumatic rivet gun:
-
Set the air pressure : air pressure should be set to match the size of the rivet and the material. They usually range between 70 to 90 psi for most rivets.
-
Use the correct nosepiece : the nosepiece is the part that pulls the mandrel head into the rivet. As such, the best nosepiece to use is the one that matches the rivet being installed, such that a 1/8-inch rivet will require a nosepiece of the same size.
-
Maintain the tool: failing to maintain the tool by cleaning and lubrication leads to poor performance, requiring additional work. Consider cleaning the tool with air and lubricating it with the right lubrication product.
Hydraulic riveters, on the other hand, are best used in heavy-duty applications. They provide higher force and better precision; therefore, their applications might include aerospace or construction objectives. They are perfect for installing large rivets that can only be installed under pressure since the hydraulic riveter does not rely on the physical strength of the employee. The hydraulic pressure should be set according to the pump used and the material, with a 3/16-inch steel rivet typically set to 1500 plus psi. Additionally, enough grease should be included in the tool to ensure no fatigue, while the workpiece should also be in place properly. Finally, tools should be regularly inspected and well-maintained, since poorly maintained tools lead to poor performance. As such, tools should be properly cleaned by removing dust with the aid of compressed air.
-
Lubrication: [Petroleum-protected]: Lubricate all moving parts as recommended by the manufacturer. Lubrication will reduce wear and ensure that the machine will run smoothly.
-
Inspection: Inspect all tools for wear, damage and check whether they are correctly calibrated. If the tool is damaged or worn, replace it at once, as no damaged or worn-out tool will perform its function as intended.
-