7 Tips For Choosing The Correct Rivet Size
Choosing the right rivet size requires precise measurements and considering material, strength, and environmental factors for optimal performance
Know Rivet Size
Choosing the right rivet size is one of the critical steps before the attachment of two or more materials. Considering whether the joint will be secure and the overall performance of the rivet in assembly applications depend on the size of the rivet chosen. To help you pick the right size of the rivet, we will make a detailed guide:
-
Measure Material Thickness. First, measure the thickness of the materials that will be joined. This shows the grip range of the rivet. It is advisable that the grip range is slightly higher than the materials’ thickness so that it will fit securely.
-
Choose Diameter Size. The rivets’ diameter will be slightly lower than the pre-drilled hole diameter of the materials that will be attached. The standard range of rivet diameters is from about 1/16 of an inch to 3/16 of an inch. Theses sizes vary depending on the level of load and stress that needs to be supported.
-
Consider the Length. Ribet’s length is important in deciding the effectiveness of the compressing process. Typically, the length of the rivet is 1.5 times higher than the material thickness. It will ensure the expansion of the rivet head on the blind side and will squeeze the materials together on the visible side.
-
Choose the Material. The most common material types for fabricating rivets are aluminum, steel, and stainless steel. The guide recommends choosing aluminum for being resistant to corrosion and scratches or stainless steel for being durable and having the machinability of forming high-pressure rivet points.
-
Evaluate Mechanical Sta. Mecsnical characteristics such as shear and the tensile strength of the rivets should be evaluated. Comparing these values carefully with the amount of load the rivets will frequently experience can prevent unnecessary damages or accidents with insecure junctions.. Make sure you consult with a rivet selling agency and follow their charts to accurately determine the best choice for either your simple or complex personal or industry application.
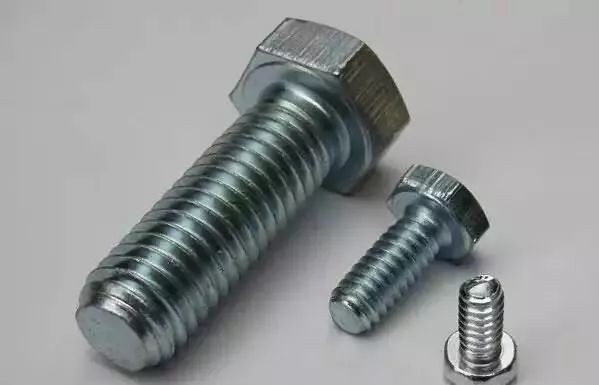
nut-bolt
Evaluate Material Grip
Choosing the right rivet size can be facilitated by evaluating the material grip. It could be determined how well the rivet can hold the materials it is used to establish a joint while having a high level of precision and error reduction. The following strategies could be implemented to ensure that the rivet safely fits the materials and does not easily break due to not having the right dimension.
Grip Range Should be Evaluated
The grip range of a rivet concerns the thickness of the materials that it can most effectively join. It is essential to pick a rivet that has a grip range compatible with the total thickness of all materials that a rivet intends to connect. For instance, when connecting two sheets with a 0.125-inch width, one should choose a rivet with a 0.25-inch grip range.
Material Compatibility Requires Assessment
Not only the rivet’s material should be taken into consideration of the materials a joint is intended to connect should require attention. If a rivet and a to-be-joined sheet are made of aluminum, there will be no galvanic corrosion caused by mixing different materials that might not be compatible. In the case when selecting one made of a dissimilar metal, the materials may intersect and result in a lowered material integrity.
Joint Requirements Should be Evaluated
The rivet size should be sufficient to handle both the shear and tensile loads and not break under pressure. Thus, for any joint, an assessment of the operational and resultant stresses should be completed to choose a perfectly fitting rivet that will not only not stand out but will also withstand the operational loads.
Measurement Tools Should be Used
The evaluation of the rivet material grip can be completed by taking measurements. In the specifics of the problem, it will be necessary to take precise measurements, using calipers, micrometers, and other tools to determine the existing material thickness. I would take measures to ensure that the rivet used is the right size, fitting the material very tightly and being reliable and durable.
Choose the Right Rivet Diameter
Choosing the right diameter of the rivet is one of the important components to make a solid and reliable fastening. In the current guide, I will describe how to properly select the rivet diameter for any type of connections.
Matching Rivet Diameter to Hole Diameter
Rivet diameter should coincide or be slightly larger than the hole in the connected materials. In practice, the ideal solution is to increase the diameter over the hole-size by the range of 0.1-0.3 mm, because this error provides a quintessential rigidity of the joint. In other words, a 4.0 mm hole should be appropriately connected using a 4.1-4.3 mm rivet diameter.
Consider the Influence of Expansion
Both of the connected materials can face expansion under the influence of temperature or other environmental changes. For this reason, a user should consider the corresponding diameter that will allow the materials to deploy without destroying the joint, because expansion is a material property that should be measured at a particular company.
Diameter vs. Load
It is essential to understand that the load is applied to the diameter of the rivet and thus, a larger diameter means the ability to sustain load. Therefore, a user should consider the approximate load and amount of potential force on the joint to understand the necessary diameter. For specialized applications, where the diameter is of extreme precedence, it is better to consult the engineering specifications, which considers riveting split systems.
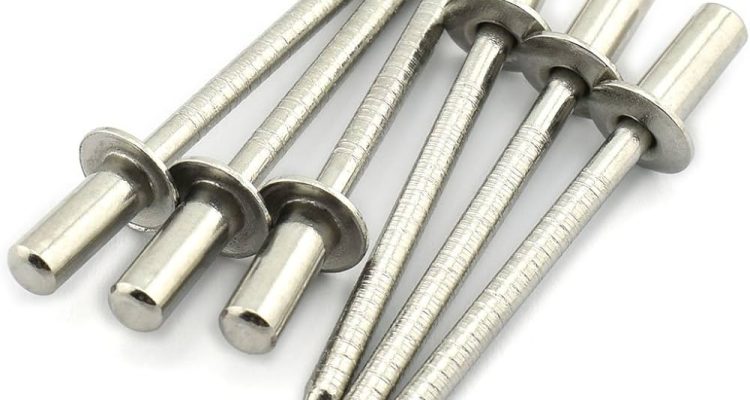
Matching Rivet Length
Ensuring the correct rivet-length is important for a secure and durable joint. If the length of the rivet is too short, the joint is at risk of becoming loose and failing over time. Similarly, if it is too long, it poses a cosmetic problem, making the joint unnecessary bulky and aesthetically unpleasing. Here’s how you can match the perfect rivet-length to your application:
Calculate Total Material Thickness
This is the basic step, the starting point for determining what length your rivet should be. For instance, if you are joining two pieces of metal, 0.1 inch thick each. The total material thickness in this case is 0.2 inches.
Add Clinch Allowance
Clinch allowance is the extra length on top of the thickness of the material, it needs to ensure that the rivet can form a proper ‘shop head’on the blind side of the assembly. As a rule of thumb, add 1.5 times the diameter of the rivet to the material thickness. Thus you can add an additional 0.15 inches to the total thickness, if the dado of the rivet in this case is 0.1 inches.
Rivet Material and Type
Certain adjustments may have to be made depending on the material and type of the rivet being used. Aluminum rivets are softer, and they may not need as much clinch allowance as the harder stainless steel rivets. Similar considerations may also apply for structural rivets that are used to distribute specific loads away from the joint.
Consult Manufacturer’s Specifications
If you are unsure, always consult the manufacturer’s specific instructions on the rivet length for that exact product. Especially for critical applications, you may want to consult a manufacturer, as they often provide detailed tables and charts based on the size, material and application of how long the rivet should be.
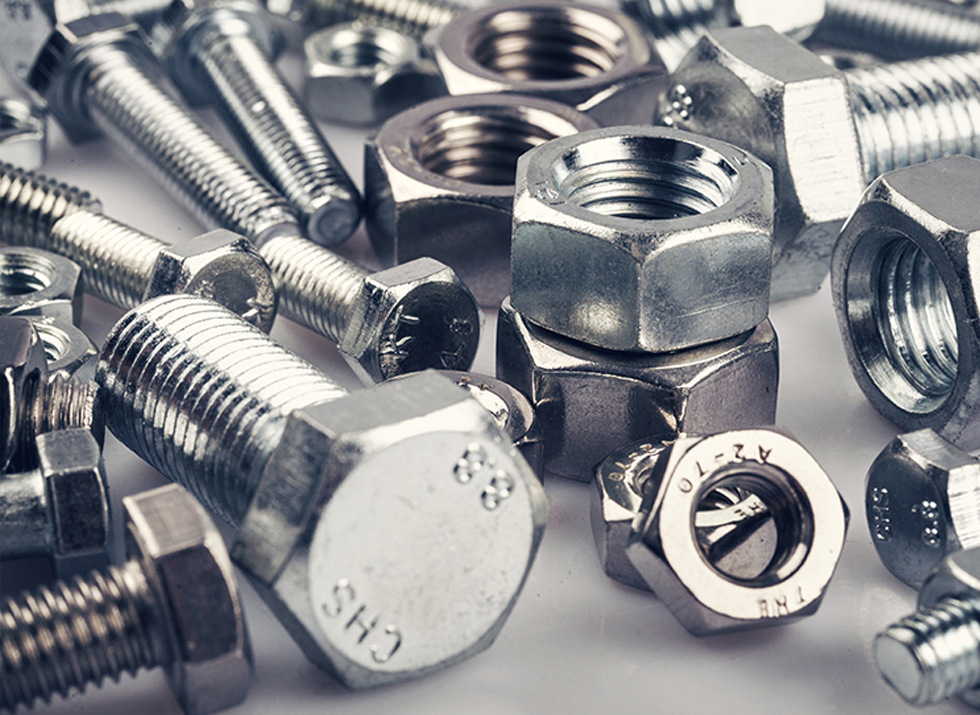
Nuts, Bolts & Washers
Choose the Right Head Shape
It is crucial to select the correct head shape for a rivet for both aesthetic and functional purposes. Namely, different head shapes serve their needs and can be used depending on the requirements of a particular application.
Identify the Application
The first step is to understand what the application needs. For instance, countersunk head rivets provide flush surfaces that are widely used in aerospace applications, where reducing drag is crucial. In turn, dome head rivets are excellent for resistance to the shear plane and can be used in general construction, where appearance is less critical.
The Material Surface
The surface in which the rivet is to be embedded and that will support its head is crucial in determining the required head shape. For instance, in cases when an even surface is to be retained, any head type can be used. However, if the surface is uneven, the head must be of the type that allows it to be flush or seems as such to adjust – a large-flange rivet.
Assess Load Distribution
The head shape can clearly distribute the load in various ways across the place where it is applied. Namely, in dome heads, the load is clamped against the surface over an area that is larger in comparison with the countersunk head. As a result, the load on dome heads is spread more evenly than with countersunk heads, which are preferable for soft materials that may be deformed by the weight.
Evaluate Aesthetic Requirements
Finally, in cases when the rivet will be applied to a part that is visible, it can be just as important for the part to look good. Rivets with brazier heads, which are slightly flatter then dome, they provide a less exaggerated appearance but are still excellent in distributing the load.
Make Sure It Is Installed Correctly
Installation is one of the key considerations for maximizing the performance and longevity of a rivet. The following guide illustrates the recommended steps for the correct execution of the installation process, contributing to both improved safety and operation.
Preparing the Surface
Rivets should be installed on surfaces that are clean and dry. This is essential as dirt and oil can compromise the strength of the connection. Adhesion depends on the condition of the surface as well as the wider issue of contact distribution. Proper preparation will, therefore, help optimise the grip and distribution of the load.
Use the Correct Tools
Employ the correct type of gun that is suitable for the load and width of the rivet. Proper tools ensure that the nail is not damaged and that it is consistently and securely set. For example, in the case of the heavier and more dense rivets suitable for heavy industrial use, a pneumatic gun is preferable. However, one must still be cautious – while the power is consistent, it can be too intense, so the exact type of pressure pull should be taken into consideration.
Inspect the Alignment
The rivet should be inserted into the hole as straight as possible. Misalignment will either prevent the proper formation of the shop head, thus weakening the joint. While the shop head approaches completion, the gun applying the force should be perpendicular to the surface.
Monitor the Installation
Pay attention to the amount of force employed in order to keep it within the manufacturer’s prescribed parameters. An excessive amount of force can either deform the rivet or weaken a material two thin parts of which are connected. Inadequate force will not hold the rivet in place, allowing for loose play. Such checks are particularly necessary in the case of pneumatic guns. Aesthetic improvements and neatness, while not definitive, can serve as broad indicators of quality. Specifically, the shop head should be adequately formed and aligned, sitting either flush with the surface or providing a mildly countersunk effect when the nail is of that type. The connection should be secure and free from wiggling.
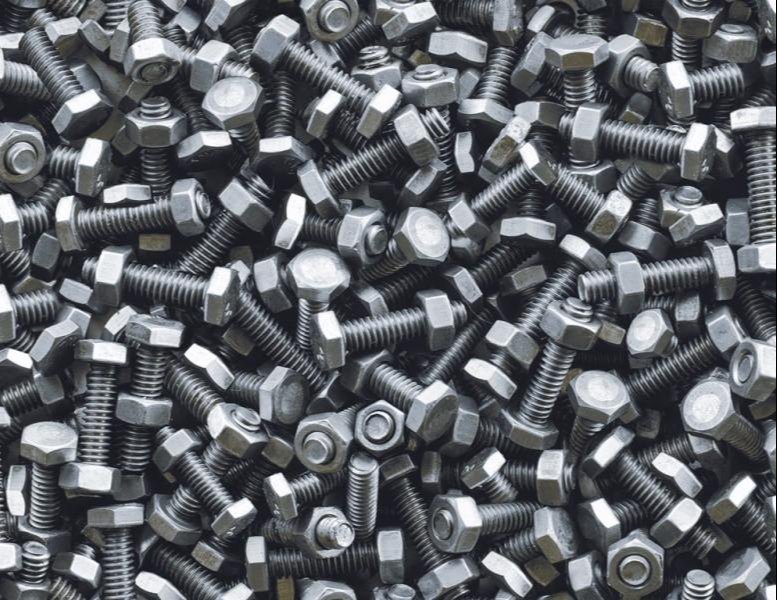
Hardware bolts and nuts top view background
Avoid Common Mistakes
There are several common mistakes that can be made when selecting and installing rivets, which can decrease fastening integrity. Here is how these pitfalls may be avoided.
Using the Wrong Size of a Rivet
One of the most frequent mistakes relates to selecting a rivet that is either too big or too small for a hole. It is important to select the closest diameter of a rivet that still fits the hole, which is typically within 0.1 mm to 0.3 mm larger than the hole’s diameter order to make a snug fit without overstressing the material that is being secured.
Forgetting About Material Compatibility
Using the rivet made of the material that does not match the ones it needs to bind can lead to varying issues, including galvanic corrosion. For example, the position of the aluminum in the galvanic series is so different from steel, that connecting these materials using a rivet is bound to be a series of corrosion problems. Thus, it is always essential to select rivets made of the material that is bound to match the materials it is supposed to fasten.
Neglecting the Grip Length
Many overestimate the length of a rivet necessary to properly perform, or so grip length, which is the combined thickness of the materials being joined. A rivet has to be long enough to allow for enough material to deform on the blind side of the riveted joint.
Improper Rivet Tool
Another common source of mistakes is an improperly selected rivet tool or the wrong setting used when shooting a rivet. That can lead attempts to set the rivets in crooked rivet heads or unacceptable level of damage to materials. For this reason, it is necessary to always correctly adjust the setting used in a rivet gun and use a proper nosepiece designed for the exact size of a rivet being shot.
Skipping Final Inspection
Some skip the final inspection of the rivet, deciding to rely on the tool, which can lead to the breakdown of an assembly line. All tools and rivets used in the shooting process have to be constantly inspected. In particular, after a rivet was shot, it is necessary to inspect it for any signs of improper forming of a rivet head and check if no part of the material is moving in the joint area.